Creating & Configuring A Trigger Webhook
Prerequisites
In order to create an Easy Trigger you must first follow the steps of configuring your smart contract.
Add a New Trigger
1. Click New Trigger

2. Fill out the form
You will get the Webhook after saving the form.
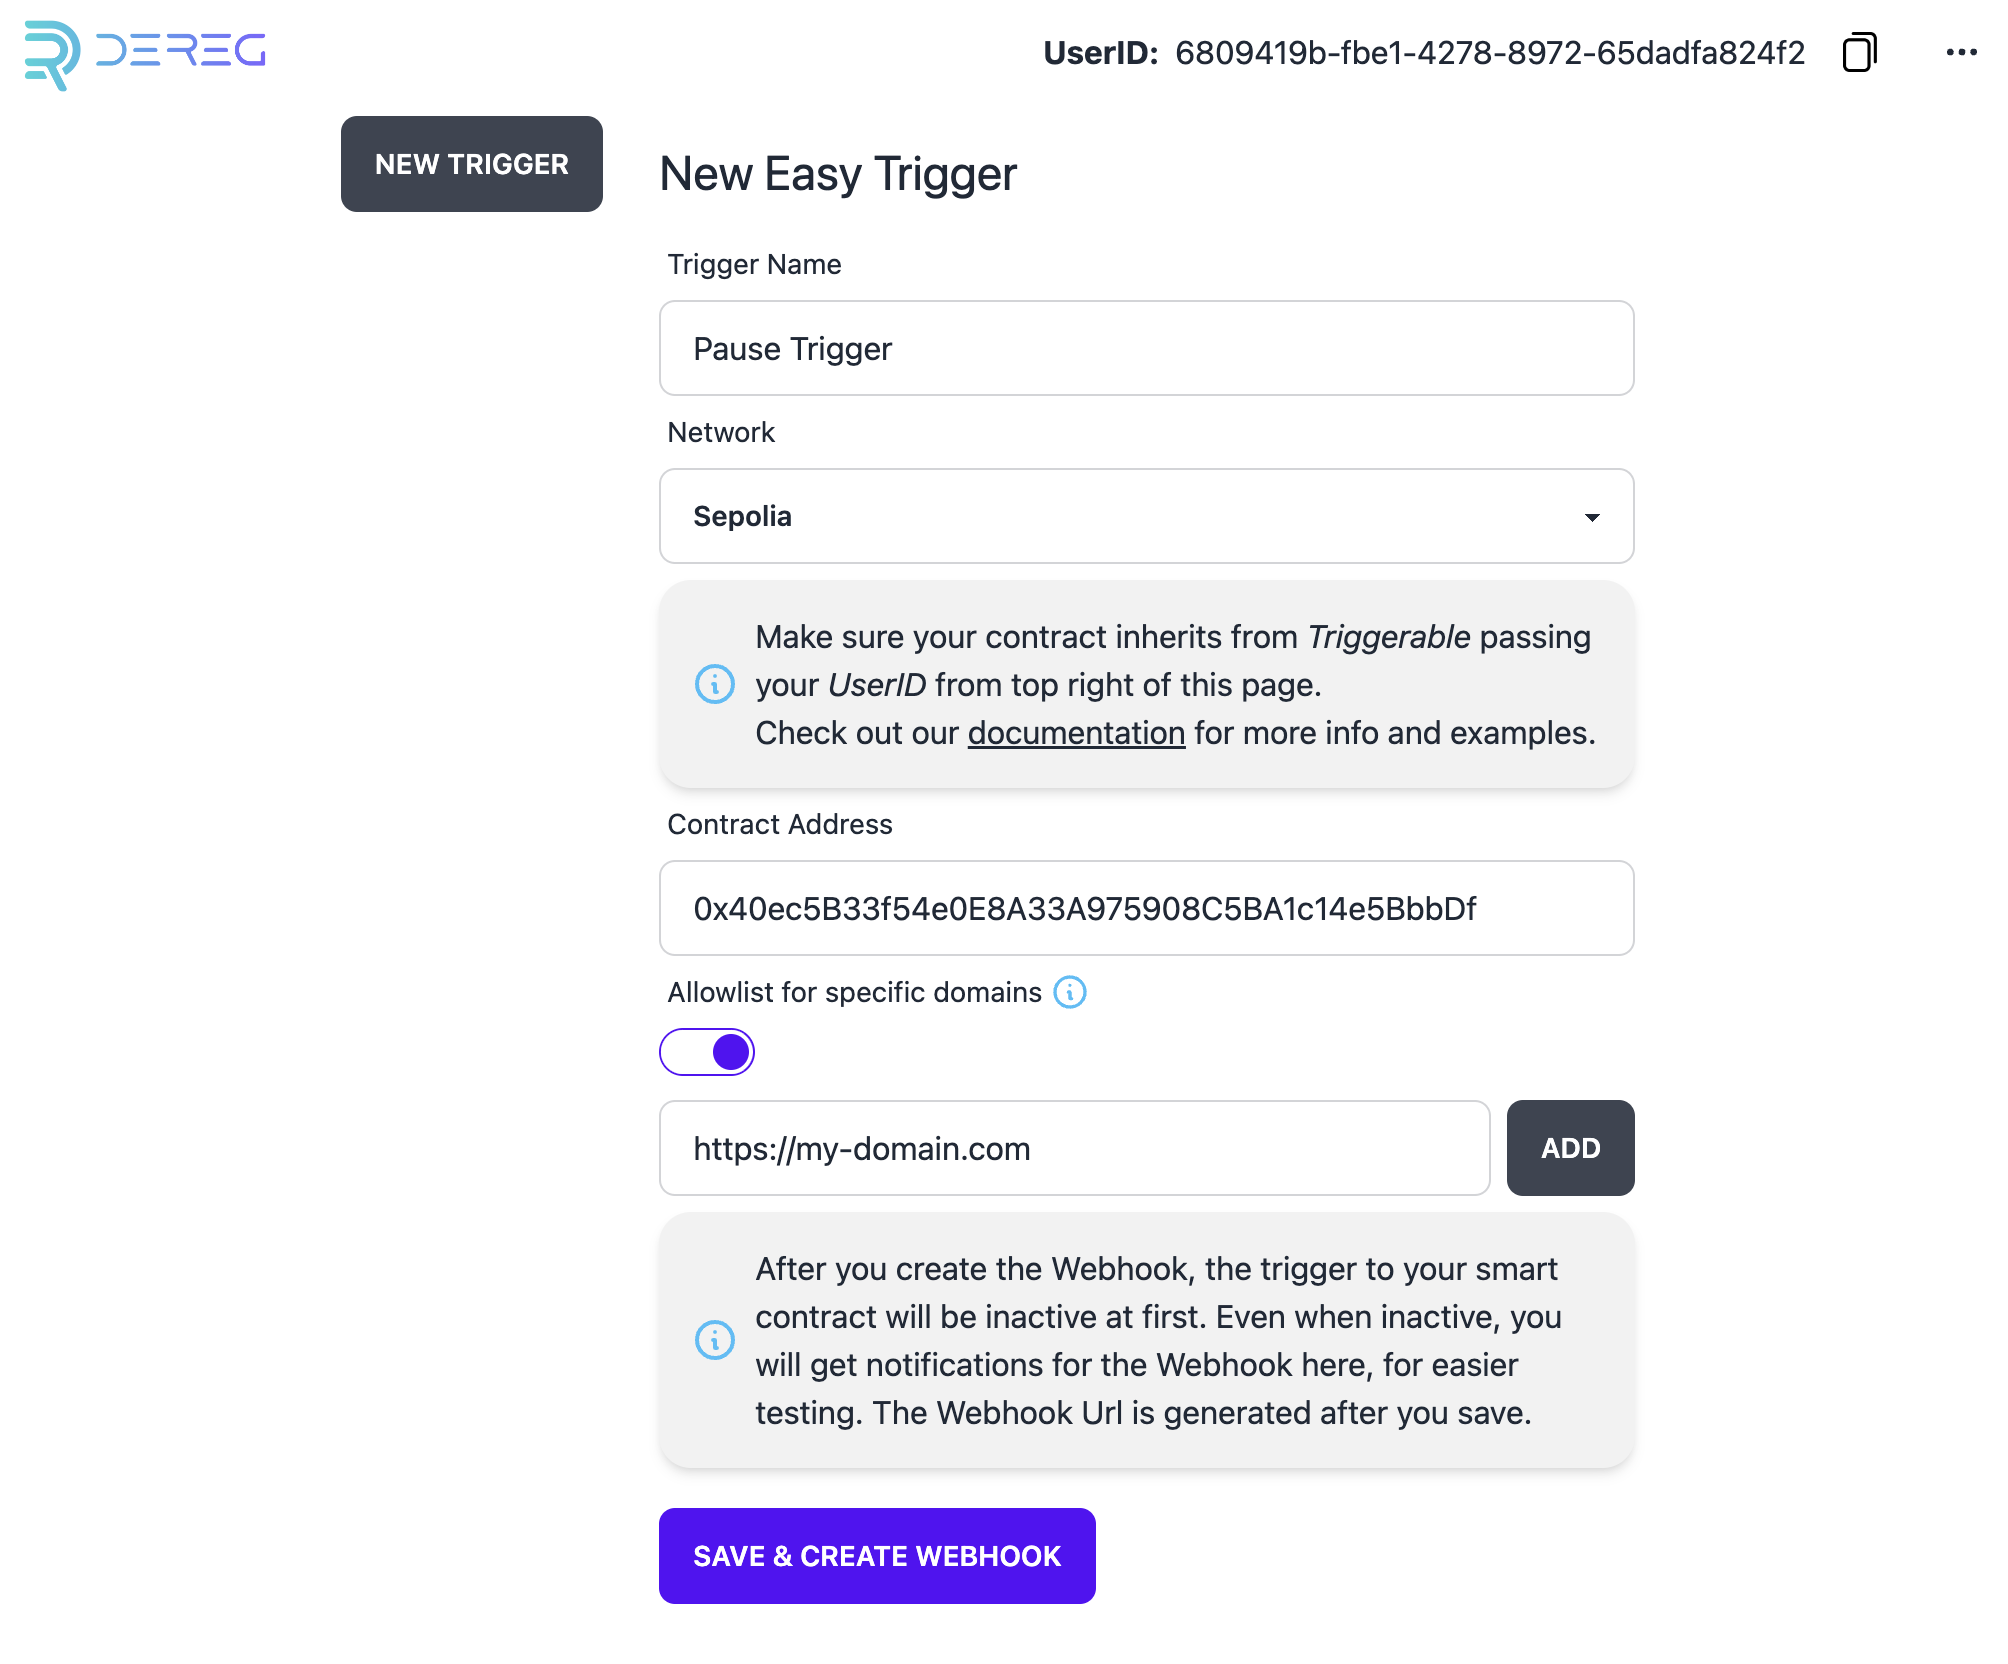
Trigger Name
Give your trigger a name.
Network
Choose the network where your contract is deployed.
Note: We do not support Mainnet yet. If you are interested in it, please let us know (contact@dereg.io).
Contract Address
The address of your smart contract. Make sure your contract inherits from Triggerable and passes your UserID (see Configure Smart Contract).
Allowlist for specific domains
Adding domains here, will restrict calling Easy Trigger to the domains you specify here. This will increase security.
If you choose to not use the allowlist, please make sure to never share your webhook, since anyone with the Webhook Url could call the Easy Trigger.
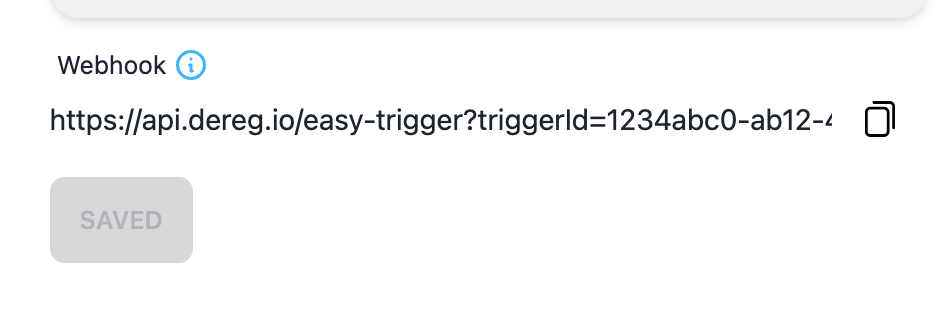
3. Click Save & Create Webhook
4. Use Webhook
After you saved, the Webhook will be created.
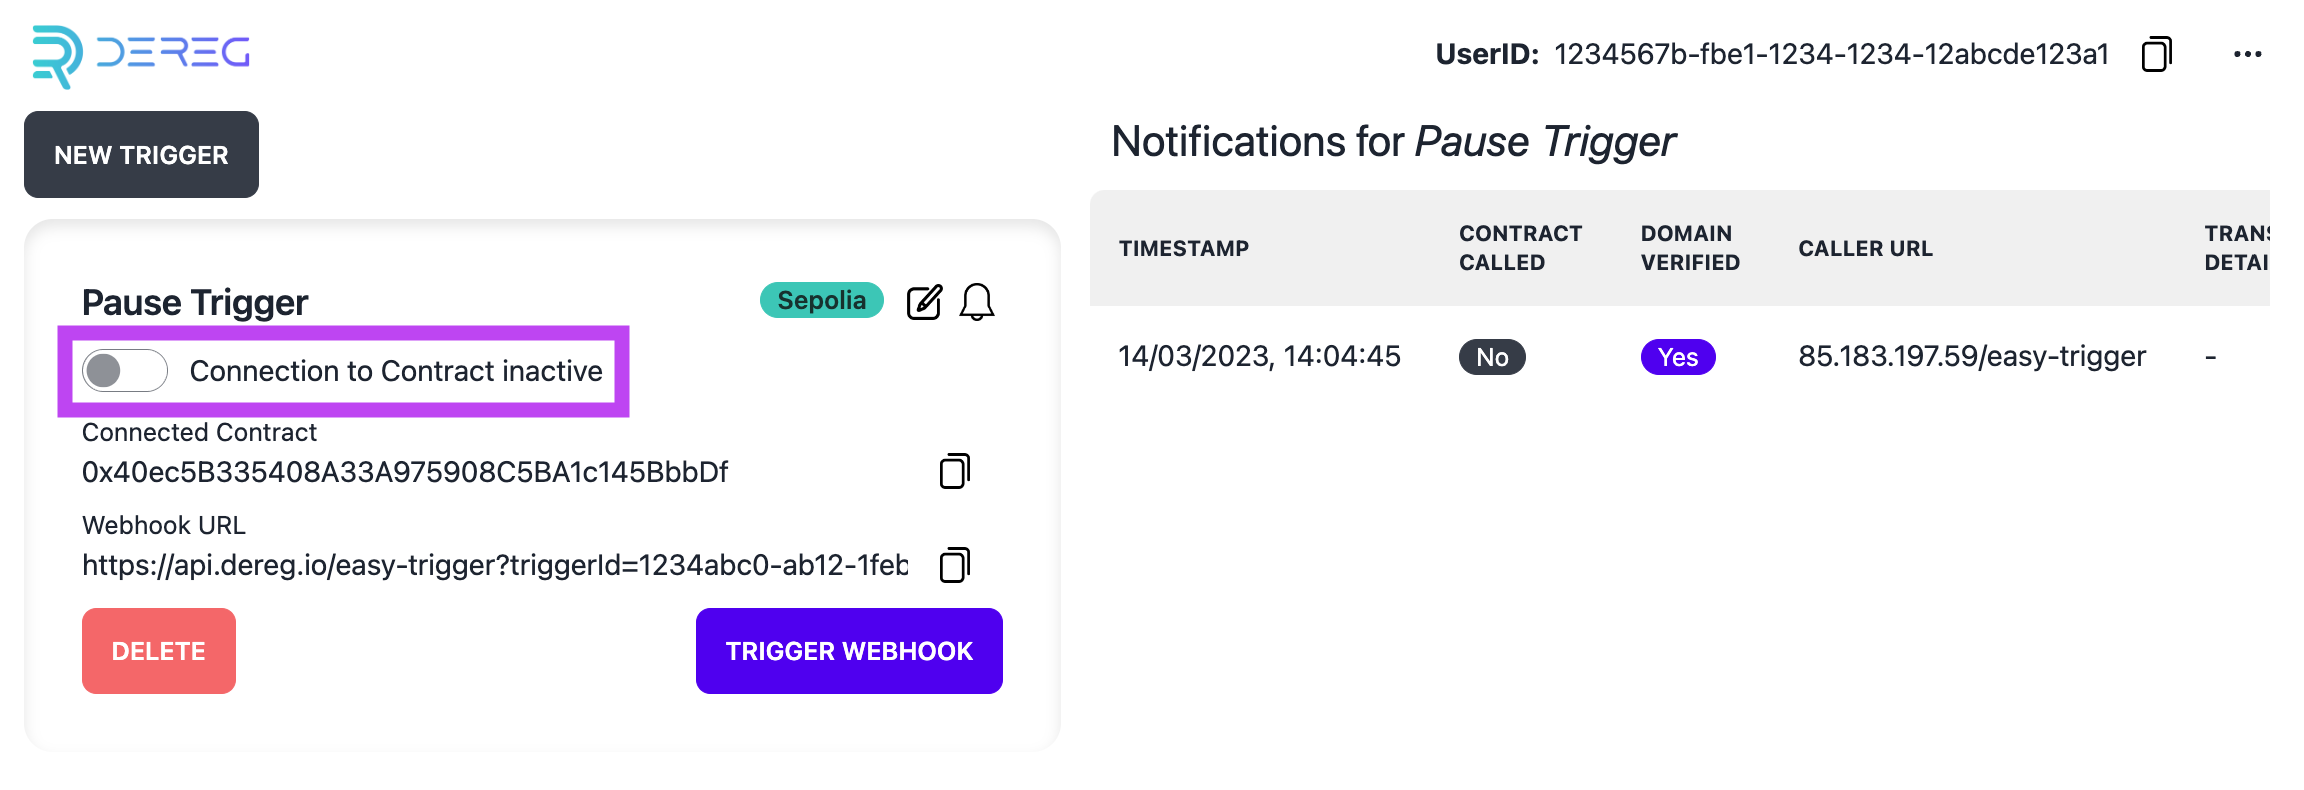
By default, calling the Webhook does not trigger the smart contract, so you can first test it. To activate it, click on the active switch (see 6.)
5. Test Easy Trigger
You can now send a POST request to your Webhook URL
Alternatively you can just click Trigger Webhook in order to test it. If your Easy Trigger is active (see 6.), pressing Trigger Webhook will also call your smart contract.
Every time the an Easy Trigger is called you will get a notification and can see details by clicking on the bell icon of your trigger.
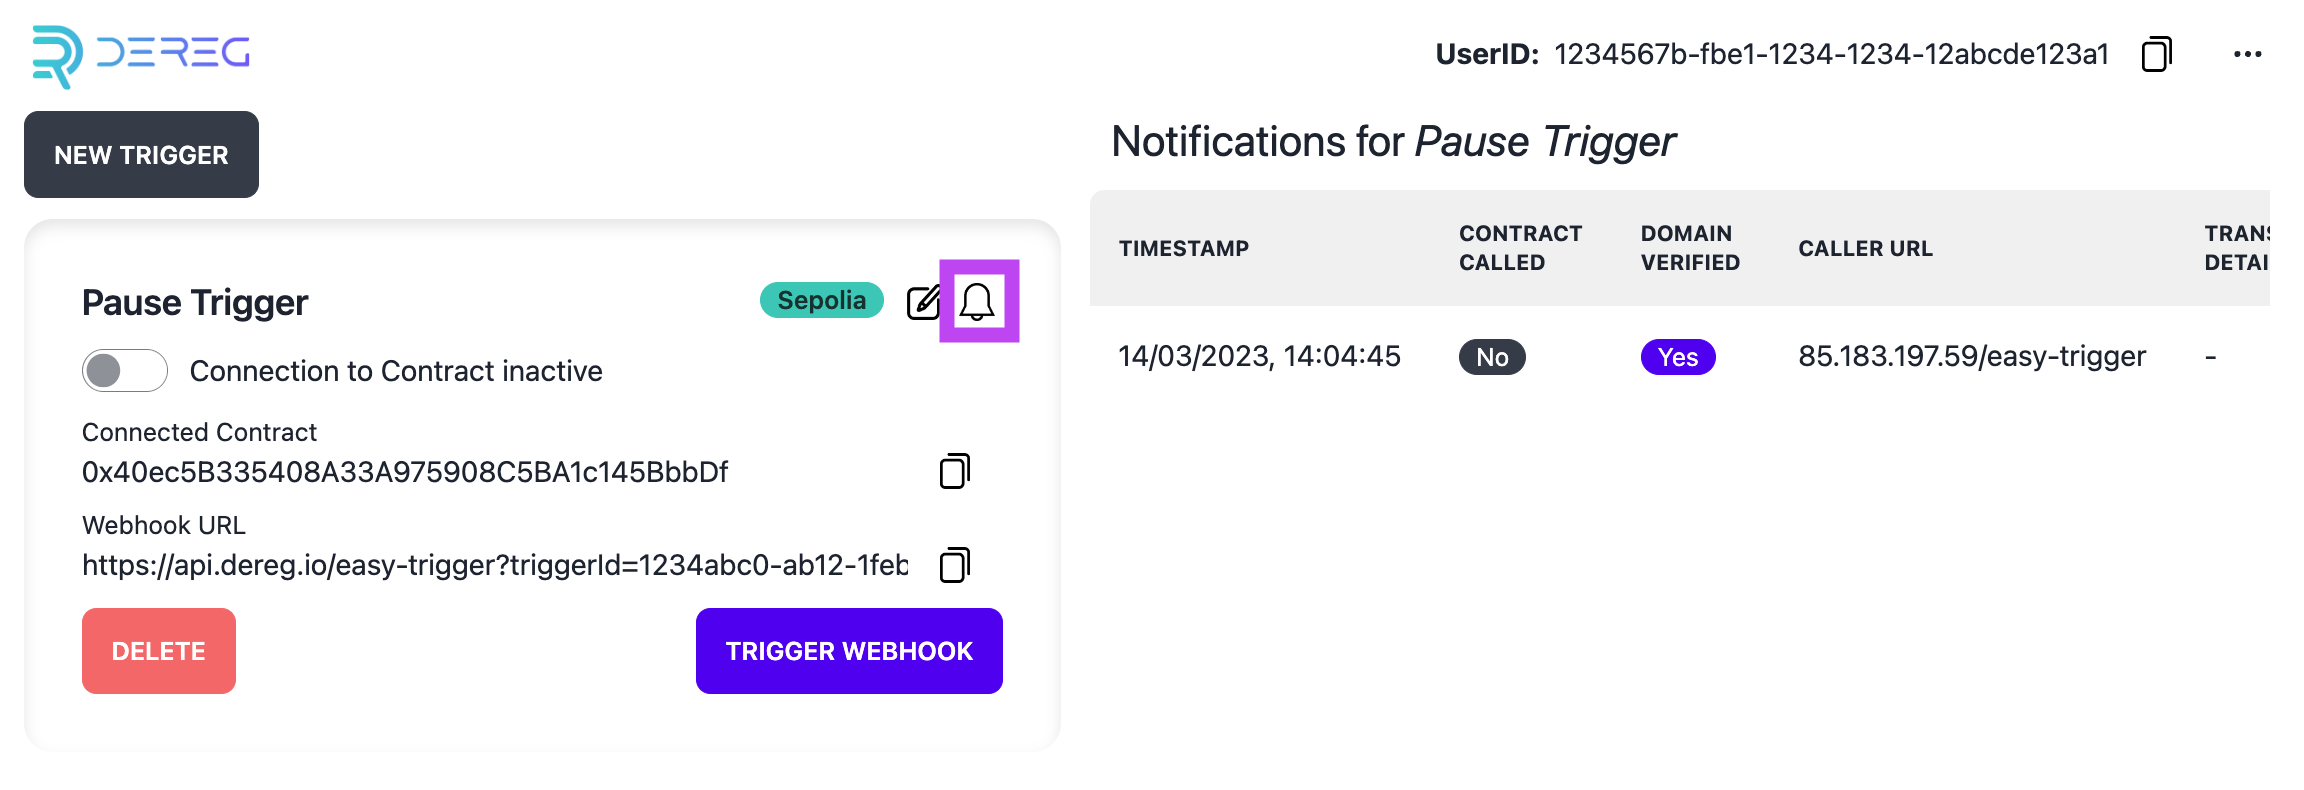
6. Activate Easy Trigger
Once you have finished testing you can active the Easy Trigger by clicking on the activate switch.